A) Using film extracts: We language teachers have been using extracts from feature films as supports for language learning for many years, since long before cool tools like videoprojectors came along. But it always annoyed me to show a film on a small TV screen in the corner of the room that a class of thirty-odd students could scarcely see, let alone read subtitles off of. Using a videoprojector (even without the EWB) has many advantages, from the size of the projected image (limited only by the size of your whiteboard and the luminosity of the classroom) to the ability with DVDs to select the target language both for the audio track and for the subtitles.
Question is, what specific advantages accrue when you include an EWB in the mix?
- You can pilot the video software, pause the film and so on, while standing in front of the class, instead of hunching down behind the computer.
- You can write directly over the video image, for example to draw arrows to various objects as a vocabulary lessons, to describe individual characters, or even to give them funny speech bubbles.
- You can switch back and forth between the film itself and a blank space where you can write student-generated commentary and explanations, or you can switch to any other computer application that might be useful at that moment: a powerpoint presentation, an Inspiration mindmap, a HotPot exercise, a webpage or whatever.
- You can have students come to the board and pilot the software or make annotations in the same way.
- If your EWB has a remote slate of some kind, you can pass it around the room for students to write directly on the board without taking the time to call somebody up.
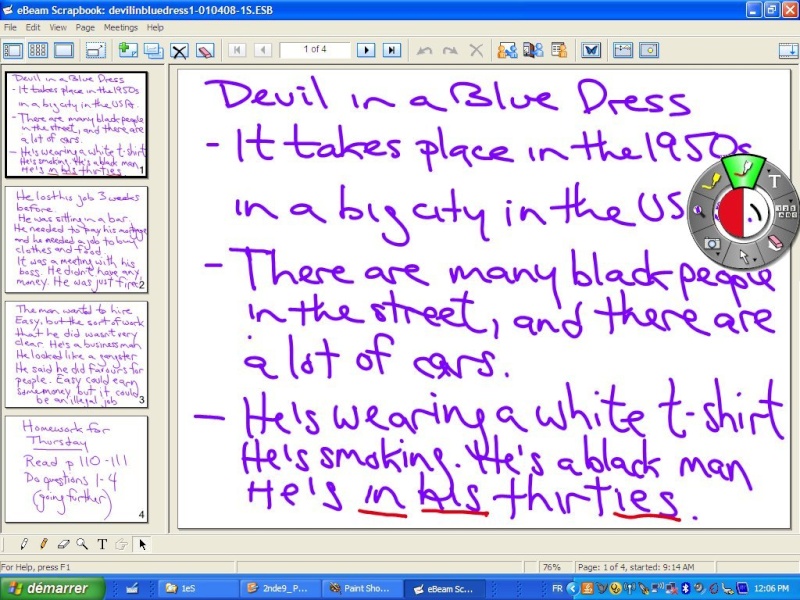
In this example from a class where students watch an extract from the beginning of Carl Franklin's Devil in a Blue Dress (1995), I asked them to present the film, and noted down their sentences, with a few corrections here and there so they could note corrected sentences in their notebooks. If I hadn't been using an EWB, I would have had to erase each addition before switching back to the film, or else project the film onto a different surface than the classroom whiteboard, which isn't often possible. With the EWB I am able to switch back and forth at will between the two applications, or even write directly onto the paused film image, as I did several times.
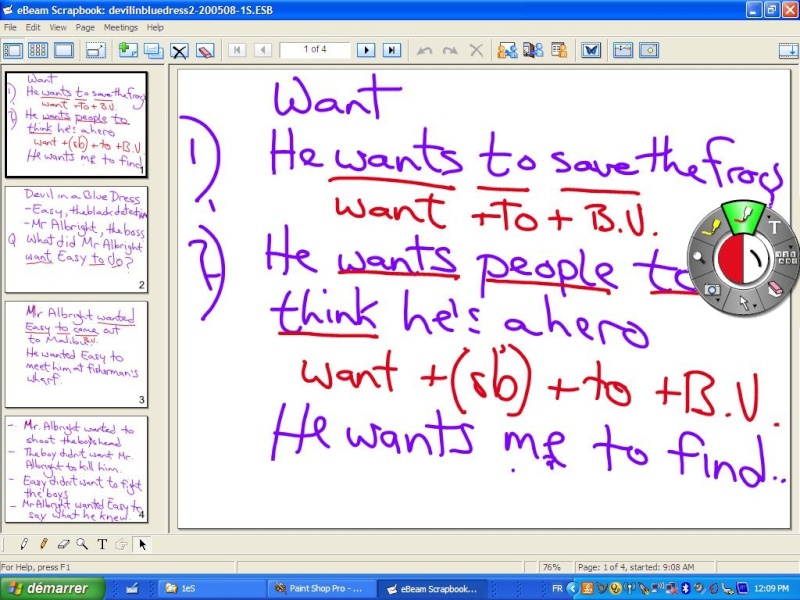
This second example shows a sample grammar lesson, which was actually a continuation of something we'd been working on previously concerning frog extinction. If you enlarge the screenshot, you can see along the left side how we developed this grammar point ("want to do" vs "want sb to do") based on sentences the students made up from the film extract.
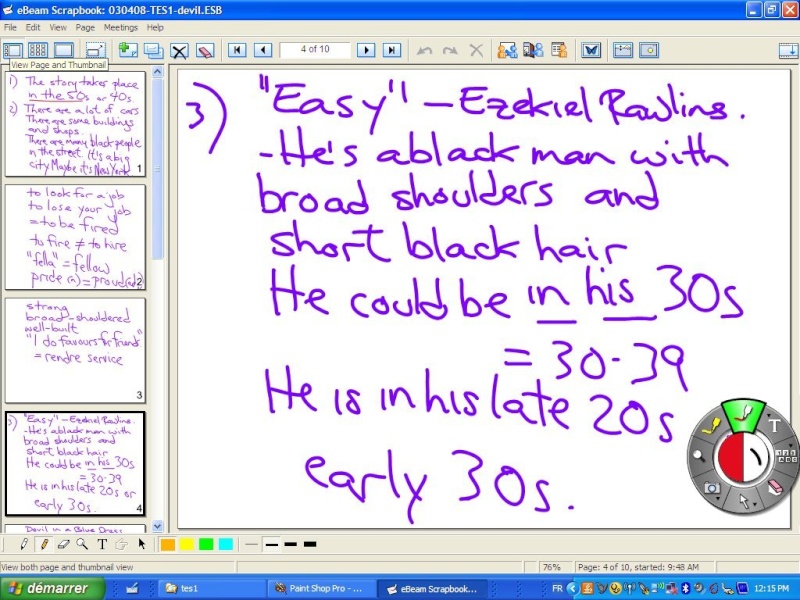
In this third example, from a different class, we were expanding on previous lessons about describing people and about expressions of hypothesis. If you enlarge the image, you can see on the left several screens where students had asked questions about specific vocabulary words. The ability to organize multiple whiteboard screens is an important feature of the "E-Beam Interact" software from Luidia, and I imagine that other EWBs have similar functionality.
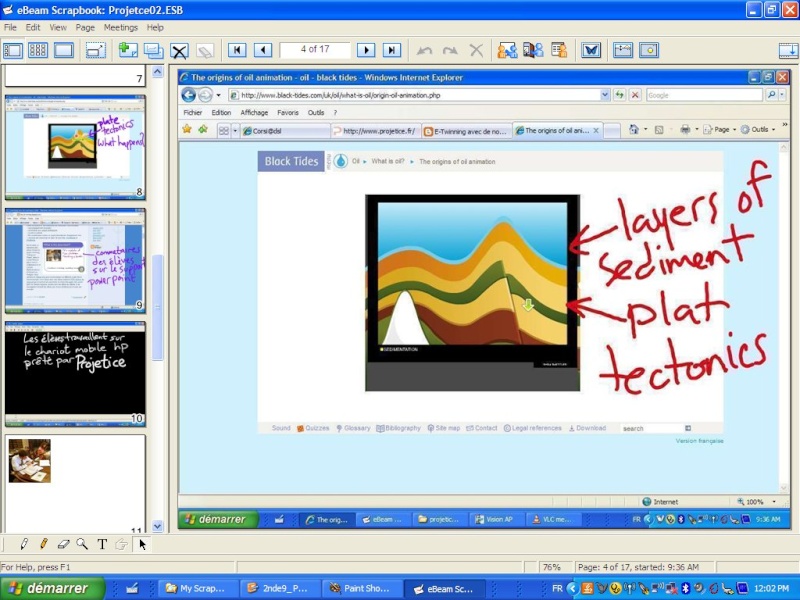
B) Using images: Like me, I'm sure you have spent years using the overhead projector to show images from transparencies. Photos, paintings and cartoons are great ways to get students talking in the target language without having to spend a lot of time pre-teaching vocabulary. The advantages to using a videoprojector with an EWB are the same as those mentioned above for working with film extracts. I would add that in many cases the pictures are clearer, easier to see, less expensive (compared to printing color transparencies on a deskjet) and you can easily zoom in on different parts of the picture to focus on specific elements.
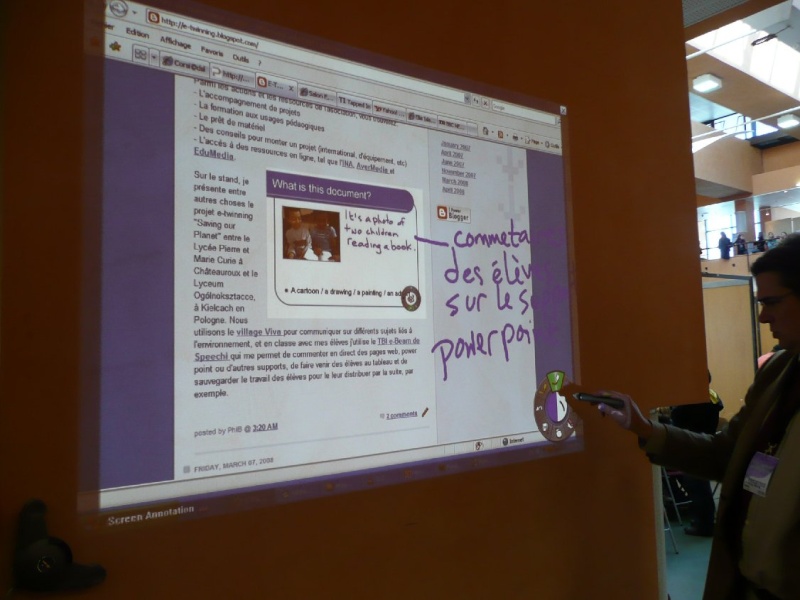
In this example you can see me writing on a webpage that contains an image of a powerpoint presentation from a lesson on describing people that itself contains a commentary - how's that for reflexive framing? The E-Beam software has a special contextual toolbar for powerpoint presentations that allows you to record your annotations directly into the powerpoint file. I find that a powerful feature, though you do need to remember to save a non-annotated version before you start marking it up!
On a side note, in the above picture (taken at the EduCorsica conference last month) I was writing on a wall that not only wasn't white, but was actually a rather dark shade of orange, and it hardly altered the picture quality at all. The versatility of the E-Beam is something that really surprised me.
I could show lots of examples of marking up pictures, but the important thing is what the EWB allows us to do so easily: comment directly on the image (or webpage, or other application page), save our comments, and switch from one page or app to the next at a click of the stylus, all while standing in front of the class, not crouching behind the computer somewhere in the back.
Please comment on these ideas, especially to point out specific differences of your different EWBs. I don't have a Smart, Promethean, Interwrite, Hitachi, 3M or other manufacturers' whiteboard in my classroom, so I've really no idea what cool tricks you can do with them. Please respond, and also learn how to post your own articles to this blog.
1 commentaire:
Hi Phil,
To be honest, I am a beginner and I don't have a lot of experience using our Smart Board at school. But I found an interesting presentation that can be useful: http://docs.google.com/
Present?docid=dhn2vcv5_106c9fm8j
This presentation is made by Tom Barrett, a teacher in the UK. His blog: http://tbarrett.edublogs.org/
Ria
Enregistrer un commentaire